 Live Music Archive
 Librivox Free Audio
 Metropolitan Museum
 Cleveland Museum of Art
 Internet Arcade
 Console Living Room
 Books to Borrow
 Open Library
 TV News
 Understanding 9/11
tv CBS This Morning Saturday CBS December 29, 2012 8:00am-10:00am EST
8:00 am

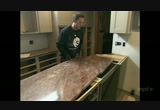
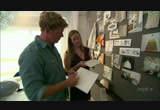
♪ >>dean: hi, welcome back to hometime for our kitchen and mud room project we've been working on. we have all the windows, cabinets and countertops in so we are close to wrapping things up. >>miriam: not quite ready to celebrate yet. we still have fixtures and appliances, granite backsplashes and a great glueless floating floor. so stick around. see how far we get. ♪ >> man. what we need is some elbow grease.
8:01 am
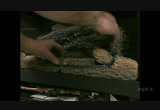
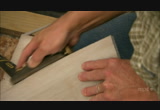
>> yeah, you can... are you kidding me? >> gmc. proud to lend a helping hand to hometime. ♪ >>dean: we always like working with traditional materials in more of a modern way, and that's exactly what we're doing here in the kitchen, mud room and bath area. here you go lenny. >>lenny: well thanks. >>dean: now it's traditional because we're working with linoleum. this has been around since the 19th century. and modern because we're working with a glueless, click lock system. now we're working with 3 different colors. a couple different sizes. i think a great looking design. and we've made some pretty good progress already in the mud room. now typically when we install a plank floor what we like to do is start on a nice long wall. lay the planks against that and then work our way out from there. but with all the cabinets around here, we really didn't have that option. so instead, we took a 2x2, snapped a chalk line
8:02 am
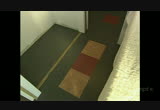
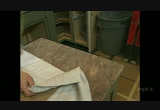
and laid it along the chalk line and started laying from that 2x2 out. isn't that right lenny? >>dan: the way we figured our starting point is looking at the accent pieces because we have one right in the hallway that's centered in the space and it's also centered in the kitchen. once we figured out those 2 points, we started. >>dean: from there, we start with the first course and work our way away from the 2x4. so lenny, what do you think about this click system? >>dan: i like it. it's a beautiful floor. it's definitely a learning curve to get it going but once you're up and running, it really goes pretty fast. >>dean: i can't believe how tight the seams are on this stuff. >>dan: which is good but when they don't fit perfectly square it doesn't let you fit it in. so you have to take a little bit of extra time to make sure you're locked in but once you're locked in, they're gone. >>dean: yeah, it's beautiful. >>dan: yeah. >>dean: now the colors were selected by nayna ramey. she's a set designer and she picked the colors. she laid out the design for the floor as well. she was involved in a lot of the selections here in the kitchen. so the colors we're using one is volcanic ash. this one is called
8:03 am
shiitake. i love the names they come up with here. and this is an accent color. it's kind of a burnt orange and this is to accent the ceiling and some of the walls. let me show you how these in the design. now it's kinda hard to see exactly what this is at first, but these are the countertops. these are the top of the cabinets. this is the actual floor right here. so you can see the volcanic ash is kind of the background color. the shiitake are our rugs here and a little rug in the mud room. and then the burnt orange are the accent pieces. she really did a nice job on it. now one thing that is a little tricky is locating exactly where we want these rug type areas in between the 2 cabinet spaces. now one thing as we're working with defined widths, these are about a foot wide. so the best thing really to do is to snap together some of the one-by sections and sort of do a dry laid type thing. you can kinda slide that back and forth so you can see exactly where those rug like areas might go. once you get it into position where you're comfortable with both spaces, lock 'em into position with a 2x2 and just start laying in this direction. you can see
8:04 am

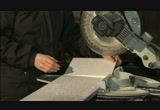
how the accents turned out in the mud room which is pretty much done now but it gives you a good idea of how it's going to be looking in the kitchen. >>dan: you can use this over any type of sub-floor but it's not recommended in bathrooms with showers and bathtubs in them. it's really important to leave an expansion joint around the perimeter of this floor because it is a floating floor and it has that room to move, but you can cover that gap with a little bit of trim. >>dean: okay, so you can see we've got our rug area taken care of here in the kitchen now. from here we worked our way back into the refrigerator. a lot of cuts but everything's looking very nice. >>dan: in certain circumstances, you can't get the click locked because you don't have enough room. so they actually say you can shave off the backside. take the bump out. glue it. it still locks in but doesn't click. it's perfectly acceptable. >>bucky: for cutting the flooring, just a couple of basic tools. we're using a compound slide saw.
8:05 am
and a table saw. and i am putting the pieces right side up. i don't want to take the chance of scuffing up our pretty floor because we don't want that to happen. there's really nothing too difficult about cutting the flooring. it's just basic cutting. anytime you're doing any finish carpentry, i like to use a blade that has a lot more teeth. you get a lot finer, cleaner cut that way. the kitchen's pretty small. there's a lot of cuts. i think there's maybe 10 pieces of flooring in there that are full without cuts so it's a lot of cuts. >>dean: now a lot of floating floors have a separate underlayment you have to put down, but this actually has a cork backing attached to it so that takes care of that underlayment. >>dan: this is the trickiest one because i'm caught underneath the fridge there, you know. whenever you have like a peninsula with detached cabinets, you have a lot of cutting and notching. the trick is to take your time. measure carefully or measure twice. cut
8:06 am
once. and be patient with it. like any other flooring system once you figure out the knack and how they want you to do it it really goes pretty well. it's a little tight in here, tom. >>bucky: why don't you just give me the numbers and i'll write 'em down here. >>dan: okay. let me get to it here and i'll give you 2 pieces. i think the biggest key you have to look forward to is make sure that everything stays clean because this is a click lock system and it won't lock unless you're lined up perfectly. which is good and bad. means it has to be perfect to lock in, but once it's locked in it's not going to go anywhere. for the final pieces where you can't get your hands in or your hammer in, they actually have installation kits. something called a ... i don't know what you call this - a little pull bar. you hook it on the floor. you pound this in and it kinda nudges it over. they're not that expensive but they're nice to have. >>dean: okay, lenny. that ought to fit right there. >>dan: oh, thanks dean.
8:07 am

>>dean: okay, so with that last piece in we have everything done on this side. we'll run some shims along the backside to lock it into position. then we can take out this 2x2 and go ahead and wrap up the floor in the kitchen. i'm going to pull out this 2x2, lenny. >>dan: go for it. and i'll keep shimming over here, dean. >>dean: okay. >>miriam: flooring's under control, and we're getting ready for fixtures including a vent fan for the powder room. so here's some stuff to think about if you're going to buy one of those. what we're talking about goes up into the ceiling. takes the moisture in the room and sends it outside through some ductwork in the framing. of course, you know what can happen if there's no ventilation ranging from minor issues like fogged up mirrors to major ones like mold, mildew and rot. so what are your options? well, the first thing you want to do is figure out what do you need the fan to do for you. some of them are setup purely for ventilation, and that will move the air just fine. a lot of them do add a light to it so it's kinda nice to get the 2 fixtures in 1. and up here where it gets a little bit cold in the wintertime, it is nice to add a
8:08 am
heater to the mix and keep things nice and toasty. the next thing you want to figure out is fan size. that's measured in cfm or cubic feet of air per minute. the rule of thumb is you want to take your room length by width multiply that and that'll give you the size of the fan that you need. so if you have a 8 by 10 foot room, you make sure you get an 80 cfm fan and you should be covered. the next thing to consider is the relative loudness of the fan. that's measured in sones. the lower the sones, the quieter the fan. so say for example, you have your master bath. you might pick one of the quieter models at 2 sones or less. that's pretty quiet. but for powder rooms or bathrooms in the more public parts of the house, your guests might feel a little more comfortable with a louder fan running at 3 to 4 sones or more. well one final thought, i would suggest hooking it up to a timer. they do recommend running the fan for about 20 minutes after a bath or shower to make sure the room really dries out. plus it'll save you a little bit of energy if anyone forgets to turn off the fan.
8:09 am
for ventilation in the kitchen we are going to be taking care of that by way of this oven unit. this is going to go in over the stove and hooks into some ductwork that we had the heating guys install for us. it sucks in the air from the bottom and spits it out outside. that's in addition to some very high- tech, high-speed cooking that this is going to do. but we're going to wait on installing this baby until our full-height backsplashes are all installed. those were all cut and polished at the same place that we saw the countertops being fabricated last time with some very precise, computerized tools. >>: we have a park fusion saw/waterjet combination. what we're able to do is set that up on the machine and do all the straight cutting with the saw portion. and then do some intricate cutting with the waterjet. so we've taken 2 machines, put it in together as 1. you can use the high yield and nesting to get a good deal for your material. >>miriam: so now that all your cuts are done, what's next?
8:10 am
>>: so right now we've actually introduced those parts that we just cut onto our cnc machine. and what it's going to do is actually going to put the edge profile on it. do some final cut touchup where there might be some seams. do sink cutouts that may not be in there and cleanup those sink cutouts for undermount sinks. all the profiling is basically put on on the cnc machine. in the past when you did it by hand, you're basically just doing it all. but you couldn't take those digital images that we took at measure that mark put together. all those digital images would go on here to get our actual final size put together for a perfect fit. >>miriam: right. it'll be the same guys, mitch and craig, who put in all the tops. pieces have been set aside for the backsplashes as well but they like to get the tops in first before doing the final measuring for those. so cory came back with the tops in place to get the exact dimensions between the new granite and the cabinets above. that's how they get a very snug
8:11 am
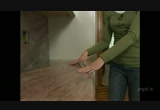
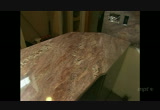
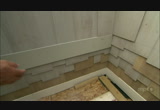
fit. >>: i don't use a laser on this. it is possible to use a laser measuring device. however, it is bit cumbersome. and sometimes there's no substitute for a pencil, a ruler and a level. i am going to draw it all out on my cad program on my laptop computer. there are a number of cutouts in the backsplash we need to make for the switches and the outlets. and although we cut all the stone out on our cnc machine in our shop, the tooling is bigger than the size of the cutout we need. so we're going to cut all of these cutouts on site by hand. >>miriam: the granite we're going with is a fairly animated stone called crema bordeaux, and we worked with mark to come up with a layout that would reflect the movement that's going on in the backsplashes along with what's happening in the countertops. so keep an eye out for that as the guys install our pieces. >>dan: we have the countertop fabricators back or as they like to be known as "the above
8:12 am
average stone fabricators". so the biggest challenge for these guys are the measuring for these outlets. >>usually i like to start with the piece that has the most notches in it and usually they're cut to size. that one is. once we get on site so we can just kinda set it in and then go from there. >>dan: these slabs showed up but there's no holes in them. so they have to carefully measure their outlets, height, width double check the pieces to make sure they transfer the holes to their pieces before they put they put them in. >>: marking the outlets, we generally take measurements and then go outside and mark the piece both on the front side and the backside because we'll have to cut it from the backside to finish the cut. now to cut all the outlets out we use a 4" diamond wheel grinder. just seems to be the easiest to get in and make those
8:13 am

little cuts. when we're cutting the outlets, we like to do the sides and the top and bottom and then also do a diagonal cut. it just helps make it easier when we flip it over to do the final cutout. helps us to connect the 4 corners and finish the cut. now once we finish cutting the outlets out, we carry the piece in. try to dry fit it before we glue it to see if there's any fine-tuning that we need to do with the height or the length. and if there isn't, we'll glue it and set it in place. >>miriam: here's one of the effects that i was talking about. you can see how the movement here on the backsplash mirrors what's happening here on the countertop. now this stone is from brazil, and with all the veining and motion in here, each piece really is one of a kind. but with some careful planning and layout, you can get 2 separate pieces that really work well together. >>: usually we'll have to do a little bit of tweaking on the pieces to get them to fit just
8:14 am
right. a lot of times it's hard to get an accurate measurement on a big piece. you see granites with a lot of flow. a lot of movement in it. you have to be extra careful with. they're usually a little more fragile. you don't want to push too hard. it will crack if you have a big bow in the wall and you try to push it back flat. >>dan: now one thing to remember here you're backsplash is actually 3-quarters of an inch thick so standard screws in your outlets and switches won't work. so what you got to do is get longer screws. screw everything in. what's nice about stone is it's non-combustible. so you don't need any extended boxes to make everything legal or correct. >>miriam: of course we have it covered for protection now but we did have a chance to finish our click floor that we were working on a bit earlier in the show. we took out the straight- edge that we were using to hold the first few courses in
8:15 am
position and we switched directions to fill in along the other side. there's quite a bit of ripping and notching to fill the planks in along the cabinets and inside the doorway to the dining room but it all turned out pretty well. for now, we're just going to keep it covered until we'll done with some of the heavy lifting in here. >>: we had to finish up. we had to drill a hole for the reverse osmosis drinking water. and we also had to finish up with a little bit of siliconing and some paintable dap that we use along the wall ridges of painted surface. >>miriam: the backsplashes are all done now, and the guys once again did a great job fitting those in between the countertops and the cabinets leaving a couple of picture perfect granite installations. so we want to thank everyone involved with those. >>: it all went pretty smoothly. not too many problems. measured very well. there was a little bit of a bow in the wall that we had to do some extra shimming. other than that, it went very well.
8:16 am
>>dan: you okay? >>miriam: yep. totally. >>dan: are we on? >>miriam: yep. we're all set to install our oven for real. we did have it temped in at one point to measure for backsplashes and to make sure the venting was in the right spot. and that's why our mounting bracket is already installed. ready? the way this works is the back of the unit attaches to the plates. then you secure the front with a couple of screws driven down through the cabinet above into the top of the unit. takes a little bit of finesse and coordination to get these all lined up just how we need to have them but once that's done it's pretty simple install. definitely a 2 person job, but pretty easy. >>dan: now you got it? >>miriam: yep. looks good. >>dan: alright. perfect. looks
8:17 am

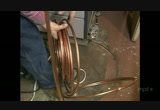
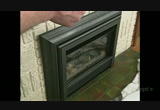
nice. >>miriam: now if you've never used one of these before, it combines the convenience of a microwave with the quick cooking of a convection oven so with the venting capabilities i'd say this is going to be one of more versatile appliances in the whole kitchen. nice, huh! >>dan: beautiful. >>dean: okay, we've got you up to speed on the floor and the backsplash in the kitchen. now we want to talk about the gas fireplace insert that's happening here in the great room. now it might seem like we're kinda bouncing around but actually as the heating guys are taking care of the things in the kitchen, they're also working on this. so in addition to running the pex pipe for the new heaters in the kitchen, they also ran some flexible gas pipe from the basement to the wood burning fireplace in the living room. and they just coiled that up in the firebox so that's been sitting waiting for the guys to come over and install the fireplace today. so we have nick niessen and joe weyandt here to install the actual gas insert. so joe, these
8:18 am
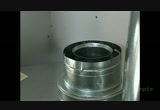
are very much the same as a drywall opening. you just slide in a fireplace like we've done so many time right? >>joe weyandt: that's right. a gas insert and a direct vent fireplace use the same technology dean. it's just that they have a couple of key differences between them. >>dean: what are the differences? >>: well those differences are: no. 1, that a gas insert is designed to go into a existing masonry structure. where as a gas fireplace is designed to go where there is no existing fireplace. so that fireplace has an insulating barrier around it so then you can frame right around it. where as a gas insert is designed to go into an existing masonry structure. you don't to have that insulating barrier. >>dean: no combustibles here. >>: correct. correct. and then the other key difference is the venting system itself. again with a gas fireplace, it uses a coaxial venting system. a vent within a vent. that inside vent is an exhaust vent and the outside vent is the intake. and by doing it that way, you're able to frame again within a short distance of that venting system. where as with a gas insert, there is no combustible
8:19 am
materials around it so they use what they call "collinear venting systems". so what we do is we drop a couple of liners down through that existing chimney system. one is an intake. one is an exhaust liner. and we attach those to a cap up at the top of the chimney. >>dean: and that i suppose just hooks up to back of the fireplace. >>: that's right dean. there's a little plate here that we attach the liners to and then we slide the insert into place. and this plate just slides over the insert. it's really a nice system. makes it easier for the installer to get the physical unit into the fireplace box so that you don't have to be reaching around in there with your arms. >>dean: now one thing i was surprised is this thing is really a nice fit for the fireplace we got. how many different sizes do they manufacture? >>: each of the manufacturers will make multiple sizes to fit a variety of fireplace openings because there is no such thing as a standard fireplace opening. >>dean: and then i suppose there are trim options around the outside so you kinda build... >>: there's different size trims to allow us to adjust for different openings. >>dean: we'll see how that works here in just a second i suppose. >>: correct.
8:20 am
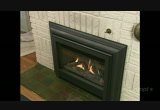
>>dean: so joe, what is it that make these fireplaces really look realistic? >>: well one of the things that they do dean is this goes on the inside of the cavity of the fireplace and it's designed to look like masonry fireplace brick interior. it also has an insulating characteristic too for the fireplaces. >>dean: yeah, i mean it's so light and it looks kinda fake right here but when you get it in the fireplace i mean it's amazing how it takes on that look. >>: yes. the logs themselves are>>: yes. the logs themselves are made out of a lightweight ceramic fiber material. you can see it doesn't feel like a real log and they're designed to absorb the heat from the burner itself. so as the unit burns these will actually glow red. and then they also add a ember nugget type of material along the burner itself which also will give you that nice glow off the unit. >>dean: so even once you turn off the gas, you still get that heat off those logs and stuff. >>: well, definitely. they use ceramic glass which is designed to radiate heat into the room. and it's excellent and very comfortable source of heat for
8:21 am
the home. >>dean: and then how about trim for around the outside? >>: sure. in this case, they've chosen what they call their contour trim kit. but there are several different trim and face combinations that you can select. some of them are very contemporary in design. some are more traditional like you see here. you can do nickel trims, or square trims, contour trims or cast iron trims that you can select. >>dean: so this is what we're using right here for our outside trim, right? >>: correct. and then our inner trim is going to be this combination here which they call the clear view. >>dean: okay, yeah. so you can get something that looks very old fashioned or fairly contemporary right here. >>: right. good to have choices. >>: yes. >>miriam: this is the last led recessed light we're going to be putting in here. you might remember the 6" units we put in before. this is a 4" version except this is also a gimbal- style which means it's going to be able tilt to give us the light exactly where we need it. with the 4" housing already up
8:22 am

in the ceiling, this part is pretty easy. hooking up the tether and the connectors and then maneuvering the spring clip up into the housing to finish it up. it's got the same 110 line voltage as the other recessed lights, but the size and the output will be more like a low- voltage light. these come in 4 different light colors. this one is going to match the rest of the lights at 2700 kelvin. and being led it's going to burn a lot longer and use a lot less energy. >>dean: so joe, with everything hooked up and all the decorative elements on, why don't we kinda step through some of the controls here. >>: sure, sure. with this remote control system, you'll never have to manually light your pilot. you can light the pilot right from the remote control system itself. and you have the capability then of either operating as an electronic ignition system or a standing pilot system. >>dean: oh, i see. ok. >>: and everything is powered directly off of batteries. so you will always have heat source for the home. even if you're without electricity you still have a reliable heat source. >>dean: because you have the
8:23 am
pilot light. >>: correct. >>dean: and what this allows you to do, too, is to operate the fire off of a thermostat, right? so if it gets too warm in the room, it'll shut the fire off. >>: correct. the handheld unit is a thermostat so wherever you set this in the room, it'll act as your thermostat. >>dean: obviously you don't want to set this right above the fireplace >>: yes. we recommend that you place it at least 10 feet away. also, when you're operating in the thermostatic mode, it actually modulates. so the remote control checks in with the receiver every 3 minutes or so and actually will modulate the flame to a lower level as you're approaching the desired temperature. >>dean: you can see why they're so easy to work with. >>: you'll just use your fireplace so much more often than you did in the past. >>dean: compared to running out in the backyard for another pile of firewood. >>: correct. >>dean: well you did another nice job on here guys. >>thank you. >>dean: it's fun doing a masonry fireplace. i've always wondered how one of these things would work, so. >>miriam: so with flooring, the backsplash and the fireplace all checked off the old punch list we are just about ready to wrap it up here. >>dean: and we still have to take care of the rest of the
8:24 am
appliance. get a couple of fixtures in yet. there's a little bit of trim left to do, but all of that next time on hometime. >>miriam: hope you can join us then. i'm miriam johnson. >>dean: and i'm dean johnson. thanks for watching. ♪ >>dean: visit hometime at pbs.org. we've got more details about our projects. tips on owning and maintaining a home. and a great glossary of building and remodeling terms. stop by and see us at pbs.org. >> got a new guy. >> well it's about time. >> where's the gig? >> gmc. proud to lend a helping hand to hometime. ♪


8:30 am

phillips: greetings from "the american woodshop." -i'm scott phillips. -suzy: and i'm suzy phillips. phillips: now, today's a different show. it's all about exterior woodworking ideas and, also, building a very special table out of a material that will never rot. suzy: also, learn how to protect your garage doors or beams from the outdoor elements using a great spray-on stain. phillips: mm-kay. don't miss this show. announcer: "the american woodshop with scott phillips" is brought to you by... ...delta -- the heart of woodworking for over 85 years... kreg -- from the first cut to the final assembly, providing woodworkers with products that help simplify woodworking challenges. kreg... ...woodcraft -- since 1928 providing traditional and modern
8:31 am
woodworking tools and supplies to generations of craftsmen. woodcraft -- helping you make wood work... gorilla glue -- for the toughest jobs on planet earth. phillips: now, the weather is closing in on us, and if you think about it, any exterior wood product, it does that all the time. so you have to come up with good choices outdoors to stand the test of time. now, this is one project right here. what do you like about this deck table? suzy: well, i love it's durable. you can move it anywhere. but it's really solid, and it comes in lots of great colors. phillips: okay, so, i'll show you a special jig on how to make this. this is a one-hour table right here. perfect for exterior barbecues things like that. then we're going to get into what else? suzy: spraying the garage doors. i'll get set up for that. you get to work on this. phillips: okay. off to the shop. okay, let's build a one-hour table together that will last forever. now, this material right here is 3/4-inch-thick stock,
8:32 am

and it's a type of board that's used in the marine industry. it doesn't rot. it stays flat. and it's perfect for food use because it stays nice and clean. okay, so, now, look at this. corner to corner just drew lines with a permanent marker with a straightedge. and right in the middle of that, i'm going to put a screw -- sink it in about, oh half an inch, just like that. nice, big washer head right there. and over here at the band saw -- primarily a band-saw project with pocket jig. you can see i have a pivot set up. now, that pivot right there is curved for the screw to go in, and it's very important that the center of that pivot is right behind the gullet -- okay, now, that's the valley between the teeth -- to get a perfect cut. now, this is locked in place ready to make that cut. this is all the way down so it just gives me good clearance but controls the board and this guard covers the blade. four-toothed blade right there 1/2-inch wide.
8:33 am
and whatever you do, work safely. be sure to read, understand, and follow all the instructions that come with the tools and products you use. i have this on. dust collection -- i'll turn that on. now i'll swing this up and pivot that screw right here in that slot. and, again, it's very important this is 24 inches across to the very curve right there. that is 11 1/2". now i just ease that pivot up, that screw and put it up against that curve. and that will give me the size of table that i want. back and forth. float it down. and now that's centered up in the slot. that's good. now i'll start the cut ease it in and just pivot it 'round. this is a great jig, a very easy way to build this table. keep forward pressure against that screw so that it gives you a perfect circle.
8:34 am
and watch these edges. they can be sharp. forward pressure always. come back, finish that circle. and that is perfect. turn everything off, let it come to a stop. never want to back out of a cut on a band saw with the blade running. that's stopped. i'll ease that up. now, look at this. handy right there. so, now we have a perfect table right there. [ blows ] and what i can do is peel off the film on the back. take that screw out. now i know the center point, and this will be the bottom of the table. and these make great cutting boards, as well. very durable. easy on the knives. and they stay sterile. so, that's gonna be our tabletop. now i'll do some layout work here,
8:35 am
and you're going to see the interlocking legs. find your center point first and drill a 3/4-inch-diameter hole right in the middle. and then we can use the band saw to cut down to that hole. so, with the two 3/4-inch-diameter holes right in the middle of two work pieces like this -- 24 inches square -- what i do is i use a "t" square right here, and i bring it up to the outside edge of that hole -- left and right -- lay in a line. i know that slot is precisely 3/4 of an inch. have it marked bottom. and, then, on the other leg workpiece here -- identical, 24 inches square -- i bring the slot on the top side, okay, 3/4 of an inch. and the other thing i like to do is use a compass on the two sides to lay out a 10-inch-diameter circle ending on the very bottom. and that becomes the foot. those were right on center. so, to make the straight cuts, i'm gonna use the band saw.
8:36 am
and to do that i need to release the jig here slide it off. it has a quick release. handy tool right here. slide that all the way out. set this safely out of the way here. and then lower the guide-block assembly with the band saw off. and that's for control and for safety. that's a guard. and now what i can do, with my hearing protection on, is cut out those locking slots -- one for the bottom one for the top. and then from there, it's back to the workbench to use a jigsaw. you want to take the line. take your time as you make this cut. there's no race here. once i have the two notches cut out on these workpieces -- there's the top notch. here's the bottom notch. they lock together nice and tight.
8:37 am
watch your fingers. no pinch points there. this has some weigh to it. i'll bring this 23-inch-diameter circle on the top. and these are slightly wider -- 24 inches square. and so what i'm going to do -- set the top aside. i use a compass on the top only, and i lay a 2-1/2-inch radius out right in this area. now, we've already got those circles out. and i'm just going to use a good jigsaw to cut these out. the technique is make sure you clamp it to a work surface to get it nice and secure as you cut these circles out. now, the reason i'm not using the band saw to do this -- i don't have the clearance. this would hit the throat as i cut those larger circles out. and with this material wear a dust mask when you mill it. so, i'll just cut those out. a good clamp really is a must to help secure the workpiece as you make these cuts.
8:38 am
and just take the line. mm-kay. with all those curves cut out, you can see this can peel right off. but let me lock the two pieces together so you can see. it's nice and solid. that's a good foundation. it's gonna be very graceful. but wherever there's a crisp edge i want to round that over. so, up here at the workbench -- and that includes on the top -- top and bottom edge -- i'm using a round-over bit piloted bearing. and this is securely clamped to the bench with that tail vise there. and i'll just round that over.
8:39 am
with the rotation of the cutter, i want to work in a counterclockwise direction here. turn it on, feed it in make those cuts. all the routing's done and i've centered up the leg assembly on the very bottom of the table. and you can see it's looking good upside-down. but i want you to see one thing. see this piece right here, how it locks and holds this leg on there? no screws needed on this piece. what we're going to do is lift this piece out and bring this over to the pocket jig and lock it in place
8:40 am
and i have the stop on the drill set -- collar -- so that it's perfect for 3/4-inch-thick stock. going to drill two pocket holes. and you have to give those chips somewhere to go. so you have to keep evacuating the chips. and you drill that out... ...until you have two perfect pockets. i want two here, two there two here, two there, for a total of eight. and once i get those done -- see those pockets? that's perfect. once i get those done, we can screw this table together, and that's your one-hour table. so, there are the eight pockets. and here's how it all comes together. up comes the other mating piece. you slide it and lock it together. and i have my layout lines. so, it's 2 1/4" in from the edge.
8:41 am
all the way around. so, that's beautifully positioned right there. that's good. same mark over here. it's all lined up. and it is square now. so, what i can do is change out the driver put the long extension in. that will give me clearance. i need a test. you can use fine-threaded screws or coarse screws. the coarse screws really auger out a lot of this material. so i want to go with the fine. it'll give me a better joint. also, you want to use stainless steel here because, after all it will be outside even though this will be out of the elements. so you take that fine inch-and-1/4 screw and you drive it... until it draws it nice and tight, just like that. and i also do want to set the clutch so that it won't possibly strip out that joint. so, now fasten this to the bottom of the table and we'll take a look at the finished project.
8:42 am
okay, one final screw, just nice and tight there. and let's take a look at this. we'll flip this over and that is one great, durable table. now, it can be sanded with 220-grit to clean it up, any scrapes. works beautifully. make sure you wear a dust mask when you do a lot of sanding. and there you have it. a great outdoor table. and it's strong, it's graceful and fun to build. now, this show is all about what you can do to make wood last outside. here are some other excellent ideas for you. let's head to a house to do some staining. now, when it comes time to stain and preserve wood use good products. but, also, buy an hvlp sprayer. when this dial is set this way it fans like so. and i'll tell you what -- can't beat it.
8:43 am
and, so, this is the red-wood stain that i'm putting on. and do it in a couple light coats. tape everything off. and once i get this all stained up -- and i'll let that dry for a day -- then it's on to a clear topcoat to make it last twice as long. so, go ahead and get this on. you want to do it when the temperature is in the high 60s or warmer. and be sure to take good care of that wood. now, one other thing i want to show you. when you have little details if you dial it to that setting right there, you can get into nooks and crannies like around the window where you don't want a high coat. you dial this all the way in till it stops. back it off two clicks. now watch what i can do here. i need to close that down just a hair. i don't need that much.
8:44 am
i can get in there -- light, light coats -- and i don't have drips and runs. of course, this painter's tape is awfully nice. so, i'll get this all done. one other technique -- when you dial it all the way up, straight up, that gives you a fan pattern like that, which is great. open it up. and that application is great when you need to make long, fluid passes like that. so... take care of the outdoor wood. these posts, as well. i'll trim this out get it all looking good. and this is white oak. okay, we'll get the job done and you'll get the beauty shot. i figure this will take, oh, about three hours from start to finish.
8:45 am
and be sure -- i wasn't wearing one now. i was not wearing a dust mask. this was for demonstration purposes only. read the label, work safely. niosh 95 mask -- very important. just get her done. now, behind me you can see that a mountain load of spraying has been done on all three doors, and they look great. two coats, water-based stain. excellent stuff. these pigments stay on the surface resist ultraviolet damage, and that's what causes 90% of all damage to the wood. it's the sunlight. now, suzy, tell us about what you're doing with the brush and why. suzy: well, i'll be brushing it in trying to break that pigment up, and get it in all those small grooves. so i'll just let him spray it, and then i'll work it in there with the brush so we really got it soaking in and it's looking good. phillips: and honestly, if you're going to do outdoor projects a sprayer like this with a great gun and at least 15 feet of hose is gonna save you an army load of time. don't go cheap. be willing to spend about $300 for
8:46 am
a system like this. it sprays everything from finishes to outdoor stains like this. now, we will topcoat this with a clear sealer, and that'll be good for a guaranteed five years. so we'll get the posts done, and then it's on to gluing solutions and special durable treatment for trim. suzy: all right. phillips: two days have passed and the doors have dried to perfection now, the posts, too. now, before we get a final look at it we have to trim out the plug holes that hold the braces onto those posts. this is an inch-and-1/4 dowel rod, hard maple, and i'm going to use that
8:47 am

to plug the holes that hold the braces on, and this is just a tenon cutter. i knock off those sharp edges. now, watch what i'm going to do here. because this is the easiest way to do it. you put some good polyurethane glue on the end here -- and a liberal amount. it's helpful if you mist it first or wipe it down with water with some rag. and that's all we need on there. and what you do is you take that long dowel rod with that chamfered edge. you ease it right on up into that area that you need to plug, and then you hammer it home. get it nice and tight. and when that glue squeezes out and cures out with that water, it's there to stay. so i'll go up and cut this off the rest of the way and then chamfer it down and that's how i like to finish the plug holes for that old barn-beam look right there.
8:48 am
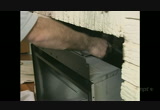
so, i'll do that to the other, and then we'll get the finished look at this big project and it's on to exterior trim. now, here's the payoff. you can see how this really dresses up the front of the house and if i do this every three to five years, these garage doors and posts will last forever. if i don't, they'll break down and have to be replaced, and especially the posts -- they can get powder post beetle in them and all sorts of decay. so take good care of them. stain them every now and then. now, up underneath on this house -- zero maintenance. why? that white trim board is actually pvc. let's go do a workshop on that with suzy. come on, cass. let's go. [ buzzing ] suzy: okay. there's a scrap piece.
8:49 am
as you can see with this pvc trim board it's kind of got a woodsy texture here -- a grain, if you want to call it -- and a smooth side. and, really, with all the trim we've done on the house, you really can't see that textured side. so we're putting that in because the flat side doesn't catch dirt and stuff. this is virtually no maintenance. you could paint it if you want. but we're keeping it white 'cause it's perfect for what we need. phillips: now, we'll get this all cut out, and then we'll trim it up with galvanized nails, and you'll see what it's gonna do for us. suzy: okay, scott, i've got the pieces cut. here's those two. soon as you do the dropped bit i'll hand you the nailer. phillips: okay, so, this first piece of trim board -- smooth side facing us -- is up and then what i'm going to do is bring this piece up smooth side out, as well because
8:50 am
it does hold dirt. this is like a jigsaw puzzle. the beautiful thing about this is once this is in no wood-boring -- the gun comes up. -suzy: ready? -phillips: thank you. no wood-boring bees or insects or any decay will ever happen here. so, i'll tack it in place. and i'm using galvanized nails. and whenever i use a pneumatic nailer safety glasses with full side shields are a must. and i don't go crazy here. three's enough to hold that. and then a couple in the front board here. that will trim it off. the pvc product also comes in all sorts of trim details. so we'll just ease that up and in and cap that off.
8:51 am

it's great for so many uses in your home. easy does it. okay. suzy: now let's go see a couple neat ideas in decking. phillips: now, you've seen some great ideas on how to beat the weather. and we don't let a little bit of rain slow us down here at "the american woodshop." okay, now, we built this deck last year in show number 1810. you can watch that on the internet. and this -- a pvc material, decking. it's perfect. now, suzy, describe the jig you screwed down. suzy: this deck jig was very instrumental in building the deck. it makes it simple and easy. you place it down there. you can drill the hole right through here and screw it in all at once. it's really great. phillips: and what you can see here -- no screws on the surface. so it makes a much better finished deck here. and, also, there are a couple other ideas and good products we want to share with you, but, you know, in woodworking and in home improvement, where can you go for good ideas? well, once a year, there's a very unique show. it's called woodworking in america.
8:52 am

here's the story. we're with steve shanesy of popular woodworking magazine. and, steve, congratulations. shanesy: well, thank you, scott. phillips: this is amazing here! it's woodworking in america. and let me ask you -- right to the point -- why is this the best woodworking show going? shanesy: well, scott what really differentiates it from the others is this show is not just about selling tools. it's about getting experience and education, sharing ideas about woodworking. here and in other parts of the building, virtually every exhibitor and a group of 16 different woodworkers are putting on classes throughout the weekend sharing their years and years of knowledge and experience. phillips: you know what? i've always learned -- one good idea a day makes you a great woodworker. and here you can get dozens of great ideas. you better be prepared to take notes. and there's a guy here john sindelar, his tool collection is staggering. i mean, he has tools from the ancient pyramid for goodness' sake. -it goes way back. -shanesy: it's
8:53 am

unbelievable. you know he came by just a minute ago and told me that in his traveling museum which is here on the show floor today, there's over $1 million worth of collectible tools. phillips: well over that. so, that's where we're heading right now. steve, keep this show going. keep making it stronger every year. and since he is the editor of the magazine, he really knows his stuff, and he's a woodworker, too. and you got to give him credit for that. thank you, steve. shanesy: well, thank you, scott. i'm glad you're here. phillips: welcome to sindelar's tool museum. we're here with john sindelar. sindelar: good to meet you, scott. phillips: now, it's taken a lifetime to pull this together. now let's get into the master tool cabinets or chests here. tell us about this. sindelar: these are what we'd call in the olden days a résumé chest. they'd open it up, show the prospective client what they could do. this guy could probably build anything in the house -- pieces of furniture, cabinets, trim. phillips: it is proof. and, then, shoulder planes over here. what do you suppose they were making? sindelar: this would be a joiner making the tongue and grooves and things like that to join furniture together.
8:54 am
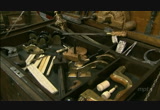
this chest here would be a wood-carver's chest with his young ladies that he has pictured on the lid. phillips: and can you imagine his clientele? if it has these beautiful ladies painted in here, i would venture to say he was dealing with a lot of ladies in the day doing the beautiful carved work. and the inlay proves he could do anything. this is different. what was this used for? sindelar: this chest came from a boston pool-table maker. it actually still has his business card inside of it and some of the inlays that he used to put on the old pool tables. phillips: now, keep this in mind. if antique tools are something you're fascinated by look up john sindelar, and it is a traveling road show. sindelar: correct. phillips: unbelievable collection. -sindelar: thank you. -phillips: stay well. check it out. what a fabulous tool collection. be sure to look for john sindelar's tools all over america and be sure to go to woodworking in america for the best in woodworking education. now, suzy, final exterior tip of the day. suzy: caulk it. clear silicone caulk. it's great for any outdoor application,
8:55 am

-anything you can imagine. -phillips: okay. and, then, when it comes down to tables like this, go to our website. one-hour-table plan is on there. enjoy it. and select the right color material. that's infused all the way through. it will never fade. so, that's it for this week from "the american woodshop." hope you enjoyed it. next week, it's on to exterior garden gates that are just beautiful, trimmed out with cedar fencing. you won't believe it. see you then. okay. let's get out of the rain. -suzy: okay. -phillips: [ chuckles ] announcer: delta -- the heart of woodworking for over 85 years. kreg -- from the first cut to the final assembly, providing woodworkers with products that help simplify woodworking challenges. kreg. woodcraft -- since 1928,
8:56 am

providing traditional and modern woodworking tools and supplies to generations of craftsmen. woodcraft -- helping you make wood work. gorilla glue -- for the toughest jobs on planet earth.


9:00 am

kevin: next on "the this old house hour"... we're going to let you in on some trade secrets. and we'll think globally about our neighborhood and our design. man: we found this great light fixture that's made in denmark. what a statement it's going to make when you walk through that front door. it looks pretty bad right here. are you kidding me? norm: is this place really worth saving? richard: we can do better than this. tom: nice and easy. everybody together. it's state-of-the-art. norm: perfectly square. roger: all in all, a good day's work. kevin: right here on "this old house." and, also, on "ask this old house"... check this out. you turn this shower valve to cold, no problem. all the way around to hot, barely a trickle. i'm going to show you how to fix it. this backyard is wide open now but we're going to enclose the whole thing with a low-maintenance fence. kevin: all that and more coming up.
9:01 am
"do it yourself" doesn't have to mean "do it alone." at the home depot's how-to community you can watch videos read tips, and get advice from fellow doers. we're proud to support "this old house" and doers everywhere. ♪ [ wind howling bird squawks ] [ thunder crashes, car alarm blares ] when the unexpected happens, state farm is there to help you get your old house to a better state. proud sponsor of "this old house." [ grunting ] man! what we need is some elbow grease. [ laughs ] yeah, you can -- are you kidding me? gmc -- lending "this old house" a helping hand since 2002. funded in part by lumber liquidators retailer of hardwood flooring. their wide selection includes bellawood prefinished, bamboo, laminate and vinyl plank flooring. lumber liquidators is proud to sponsor "this old house."
9:02 am

the project we're working on here in cambridge, massachusetts is just four blocks from porter square and lots of people every day walk, bike, take the train and drive right through this area. this is a busy melting pot -- hey! and apparently there are surprises on every corner. check this out, kevin. look at this beautiful art deco building right here. it was once a major old-line department store. now it's lesley university. but you're never going to believe what's inside this old building. can't wait. so, when the department store moved out, a series of small shops moved in. welcome to what the locals call "japantown." really. come on in. no kidding, look at this little gem tucked away in here. series of shops with every kind of japanese cuisine. look at it it's always packed. wow, look at this little alleyway, huh? it's like you've transported us straight from japan right here to cambridge. that's right.
9:03 am

so, look at this. here's my kind of menu right here. i can sort of say, "oh, yeah i think i like that one and this one" -- i like 'em all, actually. you look like a beef pho. richard: a beef pho. how 'bout this? teriyaki chicken bowl. great choices here. you getting hungry? hungry? am i breathing? of course i'm hungry. there's some great ramen here. oh, i love noodles. big bowl of noodles? richard: so, what do you feel like? i don't know what are they serving? well, pick what you want. what are you doing back there? i'm going to help, i'm not going to cook. seriously? he'll cook. all right, um... how 'bout a little bit of pork all right, and some eggs well, and ramen, of course. all right, so here's the noodles. you're making it. well, i'm going to do this much. and give it a little stir. yeah, give it a good stir. i don't want it sticking. [ laughs ] all right, kevin here is your house ramen. look at that, the pork and your egg right there. i like the fact that you're cooking for me. you washed your hands, right? you're a plumber after all. look at yours! a little hot and sour. so what's the story? is there a big japanese population here in cambridge? you know that's the funny thing. there really isn't but peop-- this is always packed, and they come from miles around to visit. well, you
9:04 am

know what, it's great to know it's right down the street from the job site. aren't you supposed to get back there? oh, no, it's still early in japan. you're going to go on japan time! if down the street it's all about japan here on the job site it's a little bit about italy, and that's because the plasterers are here. you know, there's not a lot of guys that still do blueboard and plaster, and this is a little bit of an old-world art, and we have got one of the best crews working for us. it is bucco and sons. bobby, how you been? good, you? all right. so you've actually worked with us on a couple jobs over the last couple of years. yes, we have. and it's actually a family affair? oh, yeah, it's me, my brother my brother in law, and my father, vito, who i'd like to introduce you to. vito, nice to meet you. thank you, nice to meet you. so how long have you been doing this? oh, 1950 this summer 1950. 1950! 60 years. yeah. unbelievable. now, you grew up in italy? i grew up and i came here when i was 14. and
9:05 am
got right to work? my uncle wanted me to get out of the house, so he said, "i'll send you to work with a friend of mine mr. batista clemenzi." mm-hmm. and then i was with him for 19 years. and what types of jobs were you doing back in the 1950s? well, you know, regular flats, but not like this. we used to put the -- you know, plaster three coat thick. yeah. your sons were telling me some great stories about you working. they said you used to take the train to work. train, the bus everything. there was a lot of time -- we didn't have much competition like you do today, and we used to have a suitcase like this and then we -- you know when we changed jobs we put everything in a suitcase, go on the bus. you're still using a suitcase today? why? yeah. you have all your tools, you tie them up here and everything's in there. your clothes, your shoes everything was in here. i enjoyed every day i went out. i never said once i hated it. i always enjoyed it. good. made a good living out of it. i'm not rich, i'm happy. [ laughs ] you know and it's a nice family.
9:06 am

we've done okay. so, vito, tell me, what did you think when your sons decided to go into plastering? i thought they were crazy, because i had to do it but they didn't have to do it, but they like it. they enjoy doing it, and they're doing a good job and that's what counts. i always told them i said, "don't worry how long it takes, you do a good job. you do a good job and don't worry about nothing else." nothing else. yeah. and i said "mistakes are made the mistakes are fixed." if we make a little mistake you pick up the phone, "we'll be there next day try to fix it up for you." how come a lot of guys don't do this anymore? how come it's all drywall these days? it's faster. you're doing the house in a day, they're done. this way maybe takes a week. ain't much different in the price either, compared to drywall to this. but there's a big difference in the final product? oh, yes. tell me about that. well, it's just a harder of a finish of coat. with drywall you can get your finger and go right through it like this. you can never do it, and then we put the brown coat. see that's a brown coat on the seams? that's because this has got sand in there. that's what gives
9:07 am
strength. but the sand and the joint never snap on you. if it's done right you can't beat it. can't beat it. no, you cannot beat it, no. you're a plasterer at heart. [laughing] yeah. all right, well, you and your case, we're glad you guys are here and your boys are here as well. thank you. you guys do great work. thank you. norm: well, progress on the exterior of our house continues to move right along. we replaced all the windows, but we also managed to keep a lot of the exterior trim in place and it's very simple around the windows just a flat casing that goes up and around the window and on this bay above the windows there's a nice detail, a really wide board that's divided in half by this half-round molding, and then there's another molding up here that comes out just under the soffit and we wanted to replicate that detail to tie everything together. so over on this wall where everything was replaced -- new framing, new windows and new trim -- you
9:08 am

can see above the window that same detail so it's a nice connection between the old work and the new work. now, the trim was installed. the next order of business are the clapboards and that's what dan's working on now. now, the clapboarding is nearly complete but there's some details that i want to point out that tom and his crew use that are very important. first of all, the siding comes pre-primed both sides and the edges and that will help prevent paint failure. secondly, there's a lot of details on the installation. you have this soft flashing that goes under the window casing here and under the sill. now, the next course of clapboards is going to go right here. you can see the felt paper comes down over this clapboard which has already been installed. should any water get in there, it's going to run onto the felt paper and out onto the clapboard rather than going into the building. they also have this matrix which gives a little separation between the clapboard and the structure. now, if any moisture should migrate through the house into this area it'll have a chance to dry out and prevent rot and paint
9:09 am
failure. and another very important detail when the siding is installed these joints will be caulked as well as where it meets the casings or the sill. that's all going to get caulked. that will ensure no water is going to get inside of this building and it'll be totally protected. now, in addition to clapboards we have some wood shingles to install and we're going to do that up on the third floor. now, there's a band of shingles that runs around the perimeter of most of the house and you can get a look at it right here. there's a scallop shingle at the bottom, and then several courses of shingles, and note that they don't go straight across. they're all staggered in the height and they're very random, and that's a nice detail that we thought we'd bring in to our new deck area. right. now, remember the deck that was up here before had an open railing system. well, now that it has a wall we thought it would be nice to replicate that detail over there with the shingles. now, what we're using is these shingles right here. they're red cedar. they're square and butted shingles and they're primed on all six sides. it looks
9:10 am

like you've got a start but i can give you a hand finishing it off. okay, great. first thing we did is cover our wall with this matrix right here to get a bed of air under our siding. then we installed the cellular pvc trim right here, but we ripped it on a bevel so that when the water comes down off of the wall, it won't run up and behind it, it will run out the front. we installed our starter course and then our first course finished course. then we want to make sure that none of our joints line up with the first course so that the water won't get between them. now, each course is 4 5/16 apart so i've got a line here, norm put a line on his side, and we'll snap a line and put our straight edge on it. got it, norm? yep. and for a straight edge, we're going to use a clapboard because they're nice and straight.
9:11 am
now, on this inside corner we have to weave the shingles to get a nice, tight joint. now, this shingle lays over this shingle, so i'm going to start on this side first and as you can see doesn't fit very well yet. if i take my scribe, i can follow that contour and i'll take my utility knife and shave off most of it and then finish it off with my block plane. all right. now we'll finalize it. check it. that's good, now a bead of caulking.
9:12 am
okay. now i want to do the exact same thing on this wall. set it, scribe it, and fit it. all right, now we can work our way out from the corner with the rest of the shingles. so when you look at this pattern you think it may be complicated but it's actually pretty simple to do. what we've done is we've cut a gauge block, and we're going to set the gauge block on our straight edge. i take a shingle a random-width shingle and i want to just make sure it doesn't line up with this joint here because that will leak. so now i just put it down like that, norm can nail
9:13 am
it in place. i take the gauge block out we'll take another shingle that's random, again making sure that it doesn't line up drop it on there and nail it in place. we just finished installing our last row and it stops right here at the top of the wall so now what we want to do is cut off our shingles, and we want to cut 'em straight. to do that, we're going to use the straight edge that we used for our rows, and we're going to use it as a guide for our saw. with our wall cut, we'll remove our straight edge and what we're going
9:14 am
to do is we're going to actually cap this wall on the top with a piece of cellular pvc, but the homeowners really haven't decided on what detail or profile they want for the railing yet. of course, these shingles are going to get painted to match the shingles on the house and i think it was a really good idea to do this detail on the inside of this deck. i think it looks nice. it does. norm: while we're working on our house here in cambridge, there's another team working on it as well over in boston's south end. well, this has got to be the place. there aren't a lot of mill buildings that look like this on the inside. clearly some designers have been at work. dee, andrew, you guys back here? andrew: hey, we are, how you doing? all right, good to see you again. good to see you. boy, you guys take this whole working as a team thing real seriously right down to a single office? yeah, this set-up works really well for us. we always face each other like kind of an inversion of a partners desk, so we can kind of show each other
9:15 am

ideas that we both have, and it works well. all right. well, you helped us out last year on a nearly 300-year-old colonial, and we're doing something completely different this year -- scandinavian modern. are you guys up for the challenge? we are, we loved the bedford project, but we feel like this cambridge project is a little bit more in line with our personal style. perfect. we'd love to show you what we have working. i'd love to see it. let's go. the design studio. this is where it all happens. all right, and we've got a schematic of our house. so this is really where we're doing most of our work. so the front street side of the house with the porch and entry foyer we've got the bay window in the front that's got a -- going to have a pair of really great chairs that sally's excited about. the kitchen is being designed by kathy marshall and this part of the house is mostly built in. we have a dining room table, a great window seat, but most of our furniture, we're really focusing here in the family room. great, okay, and so from this look, it's pretty crisp and clean, and i know that our homeowners wanted scandinavian modern. we've
9:16 am
heard from the architect what that means, but what does it mean to you guys? i mean, what do you do when a client says "scandinavian modern"? well, sally was really great about collecting images that spoke to her as far as what scandinavian modern was. here, you know you see natural wood white on white, clean lines. so i'm looking at some painted wood here which is white, but then some sort of bleached wood as well, so sort of monotone. exactly. i mean, it could run the risk of getting a little boring, right white on white on white? well, no, i mean, you have to look at the textures of it. so this is a hand-painted cabinet. those are going to be in the kitchen. some very, very slight striations here from the brushstrokes, i can pick those up. and then the backsplash tile is really cool. vertical and horizontal running lines. it's an oversized tile 5 1/2 x 22. oh, wow. so this actually is pretty long this way. it's going to be run all along the back wall of the kitchen. and then we have the southern yellow pine and that's going to be on the
9:17 am
hood and in the bays of the windows. so the hood above the range, and then those window bays. and i guess, you know, white on white on white is a little bit of a misnomer, 'cause you look at this, there is some contrast there. yeah, there's a lot of texture. it's very sophisticated. okay. and then, kevin, in the dining room sally really loves the slabby modern wood table that can expand, so that's our plan for the dining area, and above that we've got this great light fixture picked out which happens to be from danish design so it'll fit right in. definitely going to make a statement with an item like that and then in terms of a living room, what are you guys thinking there? the sofas we're looking at have a really nice comfortable, family-friendly look which we're planning to do in a nice, neutral fabric like this linen here. and where we're bringing color in, kevin, is we're using these fabrics here on the pillows on the sofa, so it'll be bright splashes of color on a neutral background, something that sally can change up all the time and really keep it fresh looking. so the color just comes in though, as accents. little touches. something
9:18 am
else we're excited about is the powder room. sally found this great wallpaper that has a really fun, fluid movement that has almost a water-like feel. we're painting the vanity cabinet this great blue, and i think it'll be a real surprise when you come into the house. cool. and not everything is new. do you recognize these? uh, you know i think i do. weren't these holding up a porch on our house that's no longer there? exactly. you guys collectors? is that why you're hanging on to them? well, they're beautiful pieces and we really wanted to work them into the design somehow. mm-hmm. we decided that we're going to use them in the entry foyer. as you come in there will be a table, so we're going to get a piece of wood to go over it, and it will just be a great place to drop something off or drop keys off as you come into the house. oh, that's great. it's nice to bring some of the old stuff back into the house. john and sally are going to love it. let me show you what else we're doing in the entry. we're going to do this pendant light. hangs from the ceiling. and what is this, a big, heavy piece of blown glass? exactly. we're using a local cambridge artist and she's
9:19 am
going to apply her beautiful little stencils to the glass. so this pattern right here goes on this piece of glass? yeah. oh, wow, that's going to be cool, and what a statement it's going to make when you walk through that front door. it's going to be fantastic. all right, well, it sounds like you guys have really got our homeowners figured out and know what they want, which means i guess the next time we see you is when you're at the house starting to install stuff, right? yeah, we're looking forward to it. all right. thanks for coming by, kevin. hey, my pleasure. see you, guys. bye. hey, richard, you know what, you make a good plumber, but you make a better noodle. thank you very much. one of my many talents. now, last time you and i were down here together, do you remember there was a big boiler right here, there was a chimney right here went up through the building. all gone. look what's here -- a great playroom for the kids. yeah, and this is going to be very nice finished space when it's done but is it going to be conditioned? absolutely. we're going to have heating and air conditioning both down here and the floor above using this two-inch outlets right here so when it's finished out, it's going to look like this against
9:20 am
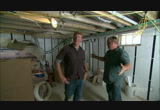
the plaster. great, okay. so, now, to power this we've got air handlers. we've got one down here and another one up on the top floor, so it's got a hot water heating coil air blows across it. there's a cooling coil right here and then there's a blower. so the air is either heated or cooled it goes into this trunk right here, and look what we did though. we actually transitioned this round trunk to this. this is 3/4 x 14. look what it allows for. enough height to actually fit down here. which the kids may not need over in the playroom but this is going to be john's workshop, so he is going to appreciate that. that's right, so we have heating and cooling, but we also have a thing called floor warming. we've used this super plastic called pex and we're going to have warm water circulating through here. if you look up here, we're going to have a little bit of floor warming. that means we're just going to heat the people's feet just enough to be comfortable, but not enough to actually heat the building. so that's not a primary heat source at all. no, no, it's just a back-up for comfort. nice feature to have, right? now, doing all our mechanicals this project is abe bilo and his gang. hey, abe. hey, guys. now, take kevin through the installation of the floor warming would you? well, the first step is applying
9:21 am
this aluminum track to the underside of the entire first floor. kevin: we've seen these before. the tube obviously tacks right up into there, and then when that is on the underside of the floor we're just going to radiate heat out? richard: yep, absolutely. once that's all up we'll take the tubing, pull it down the base, and put it in. [ hammering ] kevin: whoa, wait a second abe, hold on, now. a tool he's got to have. look at this. what is -- i have not seen -- better than swinging a rubber mallet. a pneumatic mallet. wow. isn't that something? makes it a lot easier in tight spaces. yeah, i bet, right? i love it. he's going to steal that. keep your eye on that. after that, little bubble wrap to keep that heat up. so that's going to direct it to the first floor as opposed to having it come down here into the basement. you're just going in with staples? richard: yep, try to make that heat go where it's supposed to where the people's feet are. well, we took out a huge boiler, richard so we've got to replace it with something. right, so the modern boiler is this. this is a condensing boiler, super efficient, and it's going to vent to outside through plastic venting out here.
9:22 am
we're also going to bring combustion air into it from outside and this is going to do three things. it's going to heat water and the three functions are -- start right here. you've got a circulator pump that's going to send supply and return water out to the air handles the things i just showed you one in the basement, one in the second floor. that's the conditioned space throughout the house. and that's going to heat the air coming out through the small outlets. we're going to have a mixing station right here, again with the pump, and that's going to be for the floor warming. we want milder water temperature for the floor warming. and finally, we're going to use the boiler's power to make hot water for faucets. inside this stainless steel tank there's a coil like this. boiler water goes through, heats up the tank, so we have water for the faucets of the bathtub. so one unit making all the hot water for three different uses. that's right super efficient. super efficient, and i like the fact that it is super compact and the three functions in the one right here. that's right. so our guys are so far ahead that we're going to stay ahead of your schedule. you're going to have to work hard, because we are making some serious progress outside. richard: well, the heavy equipment has arrived. it sure has, and you can see the progress we're making on the house here. painters have worked themselves around to the front, and they're
9:23 am
still doing some prep work some scraping and some sanding but they are starting with the primer coat here on the porch. that is a good sign, getting the paint. and roger's guys continue working on the hardscape here in the front yard, which is nice, and tommy tells me that this is the last load of blueboard for the house. you know, we've seen this machine before and this is really a labor-saver. you're not kidding and you know what? mark ferrante knows all about it, our tiler? he saw this machine show up and he immediately jumped on it and he said, "hey, guys, can you get my cement poured up to the third floor?" he's getting smarter as he gets older. so they brought it up there for him. now they're going to unload a couple loads of this board through this window, then a palette of the plaster, they'll get all the materials in there and then we're off to the races. they've got to just plaster and board this first floor. that means the finish line is just over the corner. and we're going to start doing finish carpentry next time. all right. all right, so, until then i'm kevin o'connor. i'm rich trethewey. for "this old house." kevin: coming up next time on "this old house"... john, i'm told that
9:24 am
this is the only item you insisted on having in your new house. that's right. norm: we'll turn up the heat on our cambridge project. kevin: look at all the ladders and the scaffolding, trailers and guys everywhere. norm: and mauro and his crew have been hard at work for the last couple weeks getting prepped for a brand-new paint job. kevin: they've got good technique and that makes all the difference with those sprayers. that's next time on "this old house." one pair of overalls a few cans of paint. add a dash of doing and mix together. that's a recipe for a kitchen you can't wait to cook in. the home depot is proud to support "this old house" and doers everywhere. ♪ [ wind howling bird squawks ] [ thunder crashes, car alarm blares ] when the unexpected happens, state farm is there to help you get your old house to a better state. proud sponsor of "this old house." [ grunting ] man!
9:25 am

what we need is some elbow grease. [ laughs ] yeah, you can -- are you kidding me? gmc -- lending "this old house" a helping hand since 2002. funded in part by lumber liquidators retailer of hardwood flooring. their wide selection includes bellawood prefinished, bamboo, laminate and vinyl plank flooring. lumber liquidators is proud to sponsor "this old house." kevin: for more "this old house," go to video.pbs.org, where you can watch entire episodes any time. tune in on video.pbs.org. this old house magazine the companion to the television series, provides advice from our experts that you've come to know. you can use your credit card to order ten monthly issues for $10. just call...
9:26 am

has anybody seen joe? joe? hey, joe! anybody seen joe? find joe, will ya? my name is joe langlais, and i'm a carpenter's apprentice. i went to vocational school for four years doing carpentry. tommy silva and "this old house" called the school and said "we're looking for an apprentice to work alongside tom." and i was like, "this is really an opportunity of a lifetime." and i knew that i got to take full advantage of this. all right, here we go again. i'm the low man on the totem pole right now because, you know, i'm the youngest here. i don't have as much knowledge as the other guys. i haven't been doing it for as long. right now tom wants me to find the smaller vacuum and i absolutely cannot find it and i need to get it right now. what do you want for coffee? medium black, no sugar. i do the lunch, i do the break i do it all. you know, going to coffee
9:27 am
and getting lunch can be pretty basic and routine, but even just being around these guys, these are the best so i really get to learn a lot about the trade, because, if the plumber's here and he needs a helping hand, i'm the first one they send to him. so now i'm learning plumbing. if the electrician needs a hand, i help him, and now i'm getting electrical knowledge. whatever needs to be done in the house is what i'm learning 'cause i'm right there. i'm installing this dryer vent right here. man: looks good, joe. nice job. look at that -- scribed all the way around. excellent. tom: all right, so don't forget, i want a bead of caulking across the back of the countertop. seal that good, but i don't want to see the caulking. all right, i understand. and how did you do on the cut? yeah, actually looks pretty good. come on, do something. i love being an apprentice because i'm just i'm overwhelmed with all this knowledge that is out there. you know, you think it's just hammering a nail
9:28 am
or, you know, putting up a piece of wood, but it is so far from that it's unbelievable. now i totally forgot what i got to do next. kevin: today on "ask this old house"... check this out. you turn this shower valve to cold, no problem. all the way around to hot, barely a trickle. i'm going to show you how to fix it. this backyard is wide open now but we're going to enclose the whole thing with a low-maintenance fence. want to put a little concrete on all four sides. woman: we're looking forward to being able to be out here playing everyday and not worried about the street. it's got a heavy metal base with a top that spins. what is it? kevin: next time on "ask this old house."
9:29 am

"do it yourself" doesn't have to mean "do it alone." at the home depot's how-to community you can watch videos read tips, and get advice from fellow doers. we're proud to support "ask this old house" and doers everywhere. angie's list, providing reviews of local roofers, plumbers dentists, and more written by people just like you, helping you find help when you need it. angie's list is a proud sponsor of "ask this old house." [ grunting ] man! what we need is some elbow grease. [ laughs ] yeah, you can -- are you kidding me? gmc -- lending "ask this old house" a helping hand since 2002. our family is growing. that's why we bought this house with a big yard. good hit! we've been working out here a ton, trying to make this yard a more comfortable place to hang out and play. nice! [ laughs ] our son is two, and he loves to
9:30 am

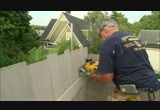
get into everything. can you come back here? and in a few weeks we'll have a daughter, too... so we'd really like to make this yard a safe place where both of our kids can play. [ laughs ] roger: morning, eric. morning, roger. thanks for coming. i want you to meet mike mclaughlin, our fencing contractor. mike, nice to meet you. nice to meet you, too, eric. mike, our job today is to enclose eric's backyard. that's great. yeah, we recently moved into this house, and we have a nice big backyard. we only have a fence on one side, and it's our neighbor's fence, so we really want to see about closing off the rest of the yard. what you have on your neighbor's side is a vinyl fence. 6' height, privacy. it'll give you great security, and best of all, it's virtually maintenance-free. you'll only have to pressure wash it every once in a while. oh, that's great. mike: what i suggest is that you carry this look along the back and side, and then we're going to come up to the house. so we'll take advantage of a free section of fence, go along the back, down the side, tie in. but where would you get started, mike? well, we're going
9:31 am

to get started out here at the double gate that we're going to install at the driveway. let's take a look. great. roger: all right, that should be good right there. all right. okay, so this is where our double driveway gate is going to go. now, it's going to open in and it's going to be big enough so you can drive a car or a truck through it if you have to. oh, wow, that actually is really convenient for us. yeah. and this is the fence that we're going to make the gate from. it's a 4'-tall vinyl fence semi-private which means there's a 1/2" space. now, we're going to go over we're going to set the post for it. as you can see, this vinyl post is a hollow piece of vinyl. what we have to do is we have to add an aluminum "i" beam inside of it to give it a strength and structure. and, also, it has a nice, flat surface that we can mount our hinge screws into. so this supports the gate, not the vinyl. yes, that's right. and there's nothing worse than a saggy gate. no, there isn't. so we notched out a little bit of the deck so that we can get the post right up against it tight. and i'm going to mark out
9:32 am

the asphalt so that i can cut it out with the electric jackhammer. so i'm just going to run a string line to the other side where the other post is going, and i'm going to keep it parallel with the corner of the deck. roger, you tell me when it's good. yeah, go to the street, mike. okay. little more. little more. i think that's good right there. there. all right. we'll make a mark there, and that's going to be the outside of this post. all right, eric, now it's time to start digging these holes. all right. what we're going to use here is a regular post-hole digger. and it's two shovels. you slam it into the ground, spread it apart, and you take whatever dirt you can get out of it, and put it over here. all right. so let's get at it. let's
9:33 am
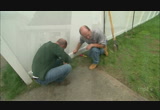
give it a go. think i got the hang of this. that's good. all right, roger you start that hole, and i'll work with eric on this one. got it. the harder you slam that in and take more material out the better it is, 'cause we got to get these down 30". 30"? that's right. that's good. all right, mike. 30, perfect, i'm all set. that's good. now, i've taken the aluminum insert and attached it to the vinyl post as you can see. now we need some concrete in the hole. okay, great, that's where i come in.
9:34 am
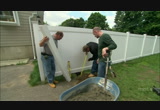
what do you want two in there, mike? two is good, yeah. now i can set the post in and plumb it up. tell me which way you want it, mike. pull a little to me. perfect. all right, eric, we could use some more concrete. all right. all the way around. do you fill it all the way to the top, mike? we'll leave three inches so we have some grass to grow around it. you just using the bar to make sure it's well-distributed around the post? right. some more? one more scoop. okay. i'm just going to finish this concrete here. now we have both
9:35 am
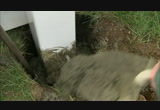
gateposts set. they have to set up in the concrete for 24 hours before we can hang the gates on them. i'm going to put this cap on. let's go start on the 6' fence. so we had our property surveyed... and this fence is right on the property line. well, it doesn't look like much of a problem. we can get this thing right out of here. come out pretty easily huh, rog? yeah, cut that for me. i'll take it right out, mike. all right, mike. watch it. good. let's get this one. got it all right? yep. now we just got a few posts to do. all right, now we're ready to start installing the 6' fence. we're going to start at the high point of the yard 'cause it's much easier to put
9:36 am

the fence in going downhill as opposed to trying to come back up the hill. we're going to put the first post in as tight as we can to the neighbor's fence. roger: you digging down 30" again? same thing. we're going to get 30". that looks pretty good. now it's time to put that post in. all right, here you go. thank you. and what we have here is the same hollow vinyl. what we actually do is we put a pressure-treated insert in up to just below the first hole. and we don't want it to impede the panel from going in. it's a mortise-and-tenon system. the panel goes right in, and we keep the pt just below that. but that gives the bottom of that post strength. gives it a lot of strength. how's that look? let's see the level. going to plumb this. it's good that way. that's real good that way. i just want to make sure that this bottom hole is above grade,
9:37 am

which that's perfect. it's just above grade. all right, eric, we want to put a little concrete around each side on all four sides. all right. put it right in the front and then around the side. that's good. another shovelful. all right. we're going to put about a foot of concrete into the hole, and then we're going to tamp the rest in. here, right? yep. all right. that should be good. i'm just going to compact that concrete, and then we're ready to add some of the material we took out. so why don't you shovel some of that in, and i'll... keep tamping. i can push this stuff from behind here, too, right? sure. yep. all right, roger, and you make sure that we're still plumb. we're good. okay. ready? dump it in, yep. all right. just keep it coming. all the way around.
9:38 am
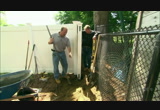
we still good there, rog? yep, right there. thank you. i'm going to run a string line the whole back run here, and it'll give us a point where we can plumb our post to. you're going to run this right to the property line there. i got it here. you tell me where you want it. let's go just past the property line. right about here. good? that looks good, rog. all right, now we're ready to set our first panel. there's two ways
9:39 am
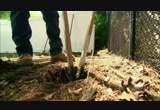
of installing a fence to accommodate the grade. one is to bring it across level and then step each panel down, and the other way is to rack it down the hill where the top of the fence follows the grade. now, in this yard, there's two different grade levels. one runs from the post that we set to just beyond that tree and the next one drops down even more to the property line. and so to get the first grade line what i did was i put a screw in on the top of the mortise line here, which is 6" above the grade. so then i put a stake in just past the tree and set the line to 6" there. and that'll give us a line to set these posts to. so let's get this first section in, rog. okay, i got. got that? now i'm going drop this bottom piece in to the mortise. you're going to just tip it back. all right, now we're going to put this top in, rog. how's that? good, just hold it right
9:40 am
there. yep. i'm just going to put a screw in through the post, into the top rail to hold it in place. and these have a little snap cap. now we're going to do the same thing on the bottom rail. we're ready for another post. see if we can drop it in get it facing the right way. there you go. okay. okay? kick that bottom in a little bit, rog. you good there? yep. good, perfect. let's just check the height here. on that bottom. that's good. all the way around just like the last one. roger: we're going to rack each panel
9:41 am
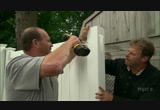
to follow those two different grades. eric, it took three days to install the fence but you now have an enclosed child-safe backyard and it all starts with this gate. yeah, and this gate is beautiful. and it's strong, too. we mounted the screws for the hinges through the aluminum "i" beam and the gate itself is hollow but we add pressure-treated wood on the gate uprights. and, also, it has a diagonal brace which gives it strength. and to open the gate just simply hit this lever. swings open. if you need to get your car through just plop this pin up, and there you go. roger: and i see you're already enjoying the backyard. we are, thank you. we're looking forward to being able to be out here playing everyday and not worried about the street. thank you. yeah, and the fence looks great. it matches perfectly with our neighbor's. now it looks like we have one continuous fence. thanks so much, mike and roger for
9:42 am

helping us out. this looks great. you're welcome. yeah, you're welcome. enjoy it. thank you. want to go down the slide? here we go. yay! go ahead! [ chuckles ] he's having fun. they're going to get a lot of use out of that backyard. they are, yeah. so, roger, some people might say that vinyl maybe doesn't have the best reputation, that it might be flimsy. well, let's just say that all vinyl isn't equal. take a look at this one. top rail, bottom rail, and that's it holding the whole thing together. all right, so not much here. now this is the vinyl fence we installed and the first thing you notice is the top cap, which helps stiffen the top. but the most important part is down here. in the bottom rail there's an aluminum "i" beam. that's going to stop the bottom from sagging or bowing. so this is really going to hold up. right, and one other thing we did is -- remember that every post had a piece of pressure-treated 6 x 6 in it to hold it in place, so it wasn't going to move. okay, well looks are important, too and as you look at this panel right here, it's pretty plain. there's not much going on. but the one that you guys installed i noticed the top cap, that's a nice detail. and i even like the molding detail here up
9:43 am
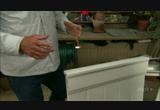
at the top and the bottom. sometimes it's those little details that can make all the difference. and i love the fact that you're not going to have to paint this. so i guess if you buy the right vinyl fence, it should last for a long time. and you know what they say -- vinyl is final. richard: all right, guys this thing comes in two parts. the top part has a little level up here. see the bubble right there? mm-hmm. mm-hmm. mm-hmm. and that sits on top of this post, the base. and you schpin it. what is it? great, i got a guess. you do? oh, yeah, you know the kids get up in the morning, right, and they're hungry and you got to get them out the door, right? and so you got a whole bunch of bagels, and everyone's in a big rush and you know, you could spend, like, a minute putting cream cheese on your bagel. and you got a lot of kids. not any-- i do. not anymore. look at this. you just put the bagel right on there. oh, and then you spin it? which way you want to go? go ahead. i'm a righty. oh, nice. nice! and then it just automatically applies... that looks so perfect. doesn't it, huh? that's so perfect. off to the next. will you get that
9:44 am
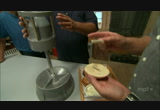
off of there, please? look at this, look at this. bubble -- balanced diet. hey, guys, breakfast is the most important meal of the day. i can't believe you're eating that after it was on here. what do you mean? that's what it's for. when i pot up plants i take time very carefully to get the soil just right and get the plants in, but the hardest part is watering it evenly with all those plants in. watering evenly? yeah, i know that's a big issue. so i just set it on here spin it around and just sit here and give it a little water. i don't think so. i don't think so. you're kidding me, right? no, i'm dead serious. eat your bagel! no, i do a lot uh, building. talking? you know what i mean? building? yeah, put cabinets in, wainscoting. you want to make sure that's level around a room. yeah, yeah, yeah. well, this is what you set up in the middle of the room. you take this little gadget right here. i take my flashlight that i wear around my head every now and then. try finding your head now. like that. turn the flashlight on. and i spin it nice and easy like that. how about that? and lookit, i have a light that will go all the way around the room and be nice and level. yeah within three inches.
9:45 am

yeah, well, it's the width of my molding. perfect. beautiful, huh? can i get you a bagel? yeah, i might need one. whoa! all right, here's what it is. do you guys have balanced tires? i do. how do you know? well, because they're not shimmying. well, if they did shimmy or you wanted check 'em -- say you had time on your hands -- you could just take your tires off your car... a lot of time on your hands. and you put it right there until the bubble is just right in the middle. oh, it's not just right. ah, what we got to do is add some weights right here. so you put a little weight right on there. is that how you balance a tire? you ain't kidding. you get a little pingy-dingy right there. then another one over here. and, eventually, you put 16, 17 of these babies on here... tom: remind me not to let you balance my tires. no. so what do you think? 'cause you obviously don't know what you're doing. hey, you guys want some whitewalls? [ laughs ] [ groans ] the gentleman who lives here loves his house at the end of a quiet cul-de-sac but as he tells it he
9:46 am
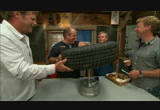
has a big house with a little problem. thanks for coming to my house, richard. well, it's a lovely house. how long you guys been here? about 16 years and we really love it, but the problem is in the bathroom, if you'd like to come this way. all right. so you've got a full bathroom here on the first floor. that's nice. all right, so what's going on? so the cold water is fine, but when you turn it to hot water we have almost nothing coming through. so you get a cold shower. all right, well, there are a couple things that could be going on inside that shower valve. let me show you how it works. now, nick, behind this nice plate and knob, inside the wall is this. this is the valve body. there's a hot pipe coming in this side, cold into this side. this goes down to our tub spout and this goes up to the showerhead. now, the key to making this mixing valve work to be able to deliver hot and cold mixed from your showerhead is this cartridge right here. now, this is brand-new so it's going to come apart easily we hope. there's a retainer clip
9:47 am
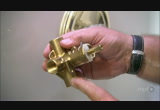
that pulls out. and now the cartridge will pull straight out. okay. so, now you can see inside. there's a hot port right here, there's a cold port right here and the hot and cold mix inside this cartridge. and inside this, also, is a pressure balance feature, a little piston that goes back and forth to adjust for changes in pressure in your building. so if somebody flushed the toilet you wouldn't get scalded from the shower valve. so what i'm going to be looking for is is there a place where impurities or something washed up in here to clog this port here the hot water port or is this cartridge clogged? so, now, it starts for us by turning the water off so i hope there's a couple of shutoff valves behind this plate. all right, so there's the handle. now a good tip is actually to close the drain so no screws go down there. and now we're going to take off the plate.
9:48 am

no shutoffs here. to the basement we go. all right, so the water is off. now we're going to take apart this valve. i'm going to pull this retainer clip. and i do not want to lose it inside the wall. there we go. all right, so we don't want any water to come out and go down inside the wall, so i have a little shield here. and now we're going to see if this cartridge will come out as easy as that new one that i showed you. [ chuckles ] come on. oh, here it comes, here it comes. some brown water. oh. little bit of dirt. doesn't look too clogged there but it looks like
9:49 am

it's got a fair amount of dirt and rust inside that cartridge. all right, so that shouldn't be like that. right. all right, so what i'm going to do is actually put a new cartridge in. let's do that. i'm going to actually make it easier for you when you have to change this 15 years from now. thanks very much. little waterproof grease just one these o-rings. okay. now, there's an "h" and a "c" right here. do you see it? that's going to be the way we want to orient this cartridge when we go back in. come on. okay. right, now the retainer clip. don't drop it, richard. good. all right, nick, why don't you run downstairs and turn that
9:50 am
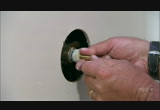
water back on for me, all right? okay. okay, richard, water's back on. all right, let's give it a test. there's the cold. that's cold. coming all the way around to hot. oh, great, you've got it! look at that, you got pressure and the water is hot. fabulous. nick, you have a working shower valve. good stuff, richard. so, you know, what do you think caused this? well, what i think happened is that piston that i talked about that went back and forth for the pressure balancing feature, i think it got clogged. and you can see some impurities here. maybe a piece of the water heater or a little flake came up and clogged the cartridge. and the manufacturer also calls out that any bathroom like this that's not used all that often that piston can actually get stuck so you really want to exercise it every two or three months. okay, i'll be sure to do that. all right. hey, thank you very much indeed for coming all the way out here. it was my pleasure. i will put the plate back together again, and i'll get out of there you guys look good. two men in a tub. rub-a-dub-dub. so you were hoping to find shutoff valves behind that plate. were they there? no, they weren't and if they were, they would have looked like this. it
9:51 am
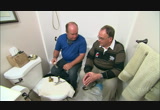
would have been a screwdriver slot on the hot and the cold. and these are really a lifesaver for future service particularly if you're in an apartment building where, if you didn't have them, you'd have to shut off the entire building. oh, right. now, how did the rust get in the system? well, a lot of people don't get a chance to visit inside of their tanks. this is a steel tank with glass lining. what you're going to find is rust. it doesn't take much of that rust to come up through here and clog a cartridge like this. all right, good information, richard, thank you. and so until next time i'm kevin o'connor... i'm rich trethewey... i'm roger cook... and i'm tom silva... for "ask this old house." so you said you took this cartridge out and exercised it. i mean, do you take it around the block? twice a day, yeah. come on. kevin: next time on "ask this old house"... i'm helping a homeowner trim out a window using only hand tools. all right, i think we're all set. woman: really appreciate your help today. a central air conditioner like this exhausts heat into the air. i'm going to show you how we can capture that heat and put it to very good use.
9:52 am
one pair of overalls a few cans of paint. add a dash of doing and mix together. that's a recipe for a kitchen you can't wait to cook in. the home depot is proud to support "ask this old house" and doers everywhere. angie's list, providing reviews of local roofers, plumbers dentists, and more written by people just like you, helping you find help when you need it. angie's list is a proud sponsor of "ask this old house." [ grunting ] man! what we need is some elbow grease. [ laughs ] yeah, you can -- are you kidding me? gmc -- lending "ask this old house" a helping hand since 2002. kevin: "ask this old house" has much more to show you. to see entire episodes
9:53 am

anytime just go to video.pbs.org. this old house magazine the companion to the television series, provides advice from our experts that you've come to know. you can use your credit card to order ten monthly issues for $10. just call... i am a chef; i cook for a living. and i think of pbs as a window to the world. that kind of place where you feel you are part of the story. i want to be part of every possible world that's out there. that's when things become really amazing. and when you are able to see stories that make you wonder make you think that's what really makes pbs so meaningful. and that's the kind of tv we need to be supporting today.
9:54 am

this old house books, including "salvage-style projects," are available in bookstores nationwide. "salvage-style projects" -- 22 ideas for turning salvage finds into stylish enhancements, step-by-step instruction and advice from "this old house." my name is don hoag, and i'm an artist. years ago, my wife decided she wanted a sculpture garden out in front of our house so i began to learn how to weld. and that developed into learning how to create different kinds of creatures that come out of imagination. i find it tremendously gratifying to create these things. i feel creative.
9:55 am

what i usually do is i find an old tool, and i look at it, and it may suggest something right there. or i may wonder, like, here's a length of pipe, i wonder how i can bend that and make it curve around. and that will suggest an animal or a shape of some sort. you never know where it's going, but it develops as you proceed. i get raw materials from scrap from things that have been thrown out on the street. one of my greatest joys is rescuing items that other people feel have passed their usefulness,
9:56 am

and finding new uses for them, creating something interesting and perhaps even beautiful. it's all in the, as they say, eye of the beholder. it's great. be more -- pbs. pbs online...


2,175 Views
IN COLLECTIONS
WJZ (CBS) Television Archive
  Television Archive News Search Service
Uploaded by TV Archive on
